Wiki - Documentation
Integrating Eduopus institute with Google drive will enable you to extend storage with additional capacity by uploading eduopus data to your Google drive account.
Setting up the integration follow the following steps:
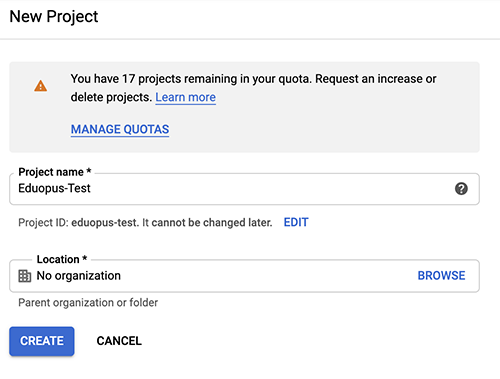
Go to Google Cloud console ( https://console.cloud.google.com ), Then Click on Create new project. Popup appears ask about project Name
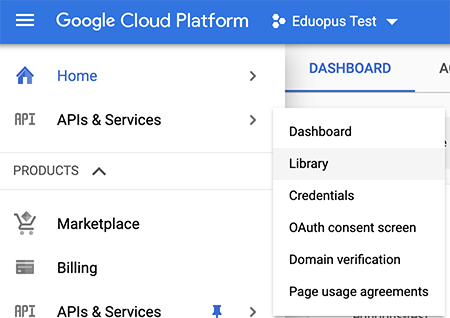
Add & Enable Google Drive API to project library
Next, You'll need to add Google Drive API to the project. First go to API & Services -> library
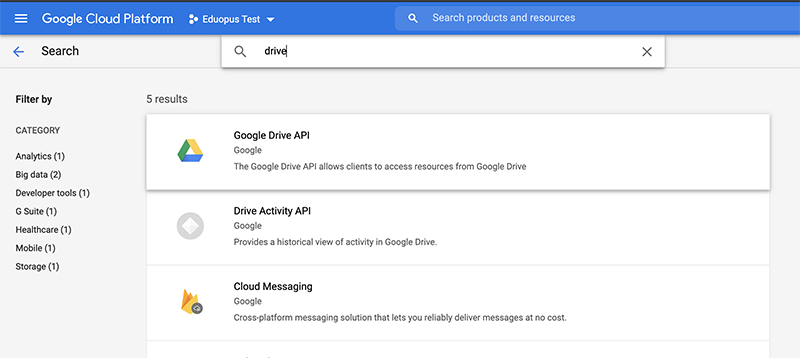
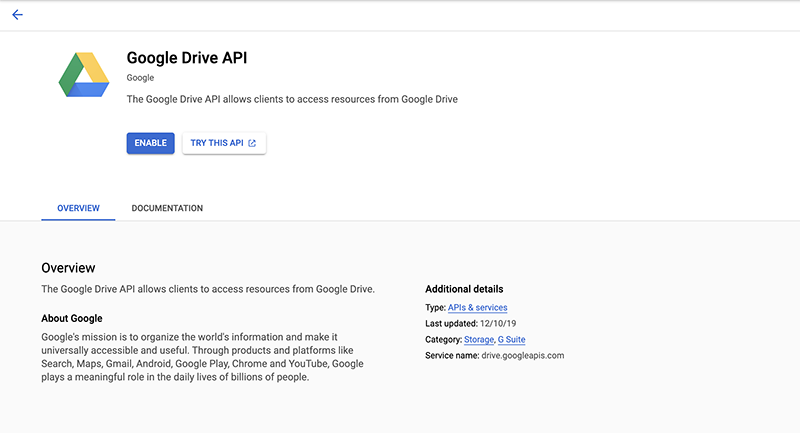
On library page, Search about "Google Drive API" and select it then click on "Enable" Button
Adjust OAuth consent screen
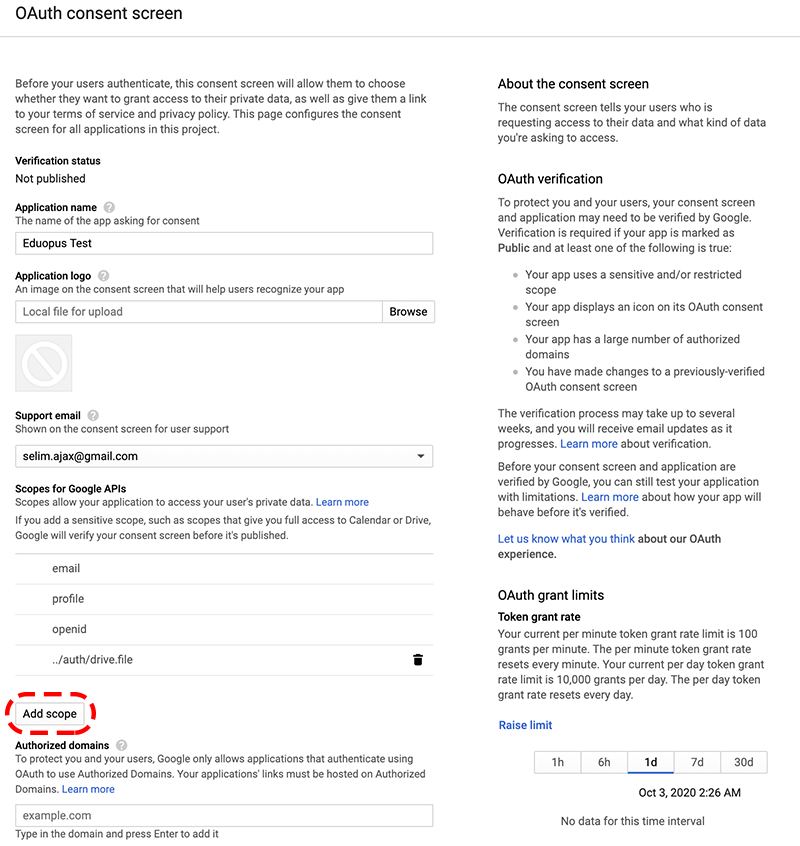
The consent screen tells your users who is requesting access to their data and what kind of data you're asking to access. to set it up, click on "OAuth consent screen" button from left menu

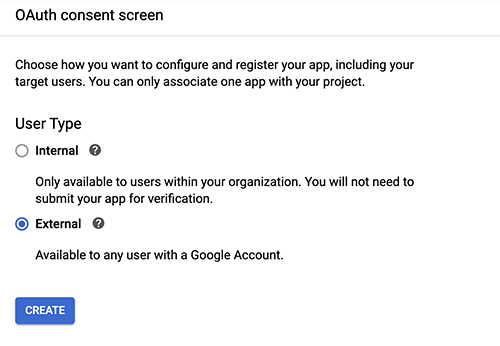
Select user type : External, Then click on create button
The following page appear, Click on "Add Scope" Button
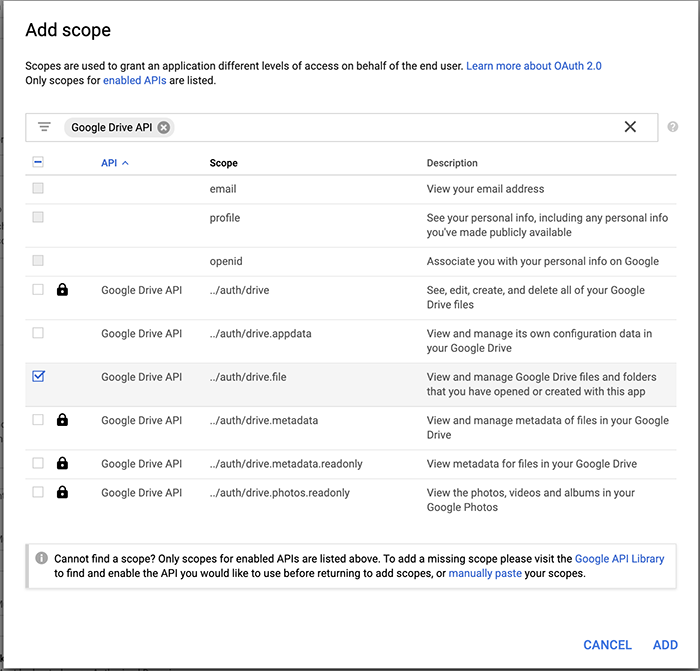
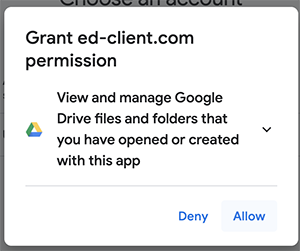
On "Add scope" button, Select the button in front of "Google Drive API" & Scope:"../auth/drive.file" like the image below
Create OAuth Credentials
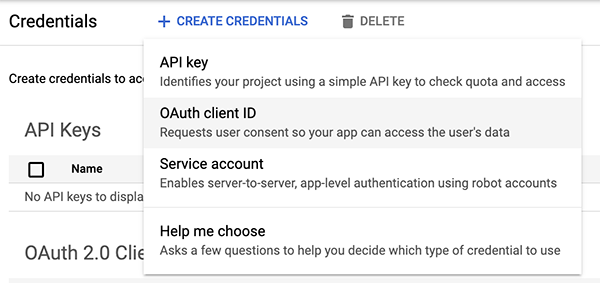
OAuth credentials create API Key & API Secret to be used by Eduopus platform for files ooperations. To Create new OAuth Credentials, Click on "Credentails" Button on left menu

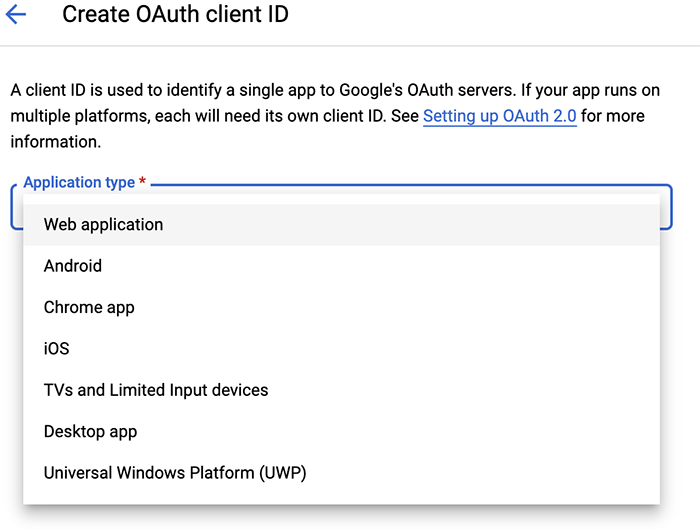
Then on next page, Click "Create Credentials" button and selelct "OAuth cllient ID"
On the next form, Select Application Type: "Web Application"
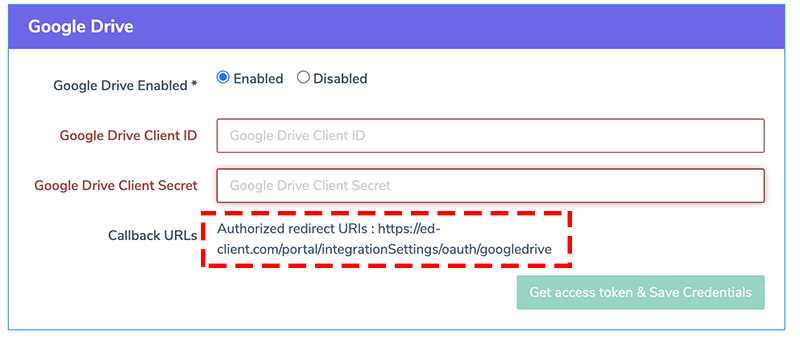
You'll need to add Authorized redirect URIs, Click on "Add URI" button. Authorized URL is available on Eduopus platform, go to "Administrative Tasks -> Integration Settings -> Disk Integration -> Google Drive"

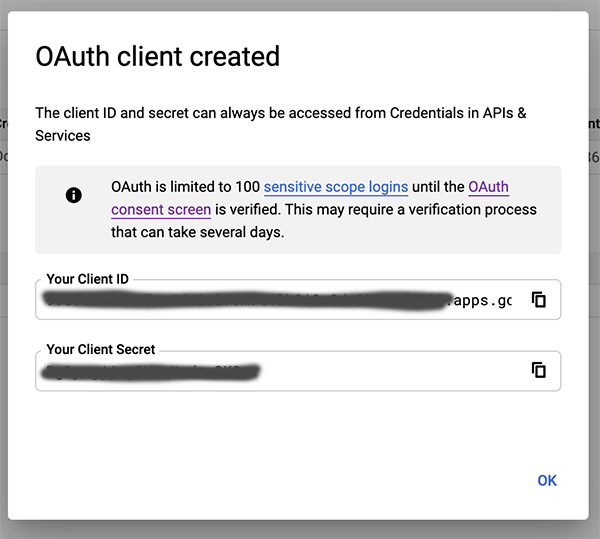
Then Click on "Create" Button, Then popup "OAuth Client Created" appear.
Add Client ID & Client Secret to your Eduopus platform
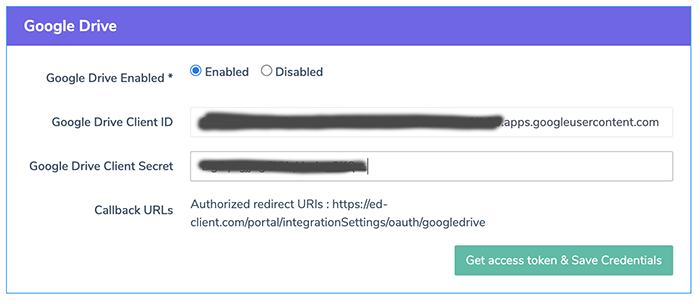
Copy Client ID & Client Secret from the previous step and paste on Eduopus platform, go to "Administrative Tasks -> Integration Settings -> Disk Integration -> Google Drive"
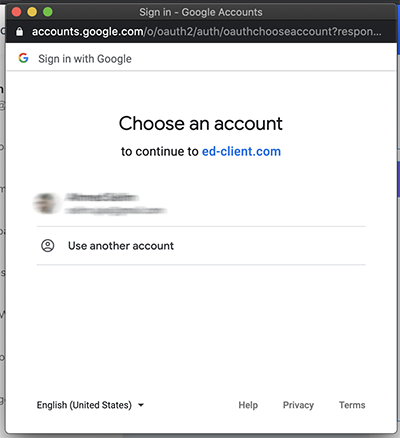
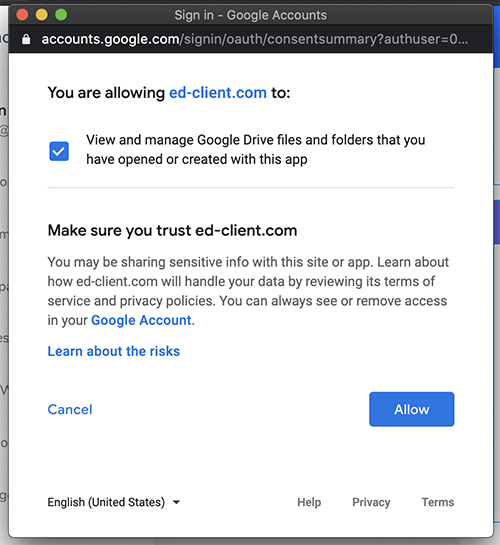
Gain permissions to your account
From the previous step, Click on "Get access token & Save Credentials" Button. New popup will appear from your Google Account, Select your account, Then Grant permission by click on "Allow" Button.
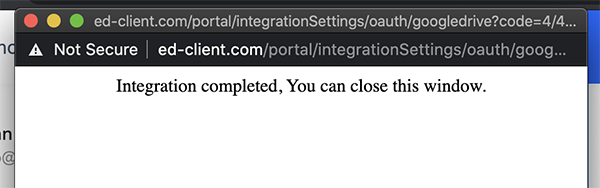
Finally, Integration is completed.
Setting up the integration follow the following steps:
- Create google account ( if you don't have ) or use your account
- Go to Google cloud console account
- Create a new project
- Add & Enable Google Drive API to project library
- Adjust OAuth consent screen
- Create OAuth Credentials
- Add Client ID & Client Secret to your Eduopus platform
- Gain permissions to your account
Go to Google Cloud console ( https://console.cloud.google.com ), Then Click on Create new project. Popup appears ask about project Name
Add & Enable Google Drive API to project library
Next, You'll need to add Google Drive API to the project. First go to API & Services -> library
On library page, Search about "Google Drive API" and select it then click on "Enable" Button
Adjust OAuth consent screen
The consent screen tells your users who is requesting access to their data and what kind of data you're asking to access. to set it up, click on "OAuth consent screen" button from left menu
Select user type : External, Then click on create button
The following page appear, Click on "Add Scope" Button
On "Add scope" button, Select the button in front of "Google Drive API" & Scope:"../auth/drive.file" like the image below
Create OAuth Credentials
OAuth credentials create API Key & API Secret to be used by Eduopus platform for files ooperations. To Create new OAuth Credentials, Click on "Credentails" Button on left menu
Then on next page, Click "Create Credentials" button and selelct "OAuth cllient ID"
On the next form, Select Application Type: "Web Application"
You'll need to add Authorized redirect URIs, Click on "Add URI" button. Authorized URL is available on Eduopus platform, go to "Administrative Tasks -> Integration Settings -> Disk Integration -> Google Drive"
Then Click on "Create" Button, Then popup "OAuth Client Created" appear.
Add Client ID & Client Secret to your Eduopus platform
Copy Client ID & Client Secret from the previous step and paste on Eduopus platform, go to "Administrative Tasks -> Integration Settings -> Disk Integration -> Google Drive"
Gain permissions to your account
From the previous step, Click on "Get access token & Save Credentials" Button. New popup will appear from your Google Account, Select your account, Then Grant permission by click on "Allow" Button.
Finally, Integration is completed.